
Affiliate Disclaimer : This post contains affiliate links, which means I earn a small commission if you make a purchase through these links. This doesn’t cost you anything extra, and it helps me keep creating free content like this guide. I only recommend products I personally use and love.
Incorporating vegetarian meals with beans into your diet not only has massive health and nutritional benefits according to the American Heart Association, but also transforms your cooking with incredible variety, nutrition, and flavor. Mastering vegetarian meals with beans is one of the most valuable skills for healthy, budget-friendly meal prep.
I used to be intimidated by the soaking, the timing, the fear of ending up with either crunchy pellets or mushy paste. But once I mastered this technique, I cut my grocery bill significantly while boosting the flavor and nutrition of my meals. If you’re new to vegetarian meal prep, check out my beginner’s guide to healthy vegetarian meal prep to understand how beans fit into your weekly planning strategy.
Consider exploring my collection of 25 easy vegetarian meal prep ideas to see how beans can transform your weekly cooking routine and keep your meals exciting and nutritious.
Last month, I calculated that cooking beans from scratch saves me about $40 monthly compared to buying canned. That’s nearly $500 a year—money I’d much rather spend on fresh vegetables and good olive oil!

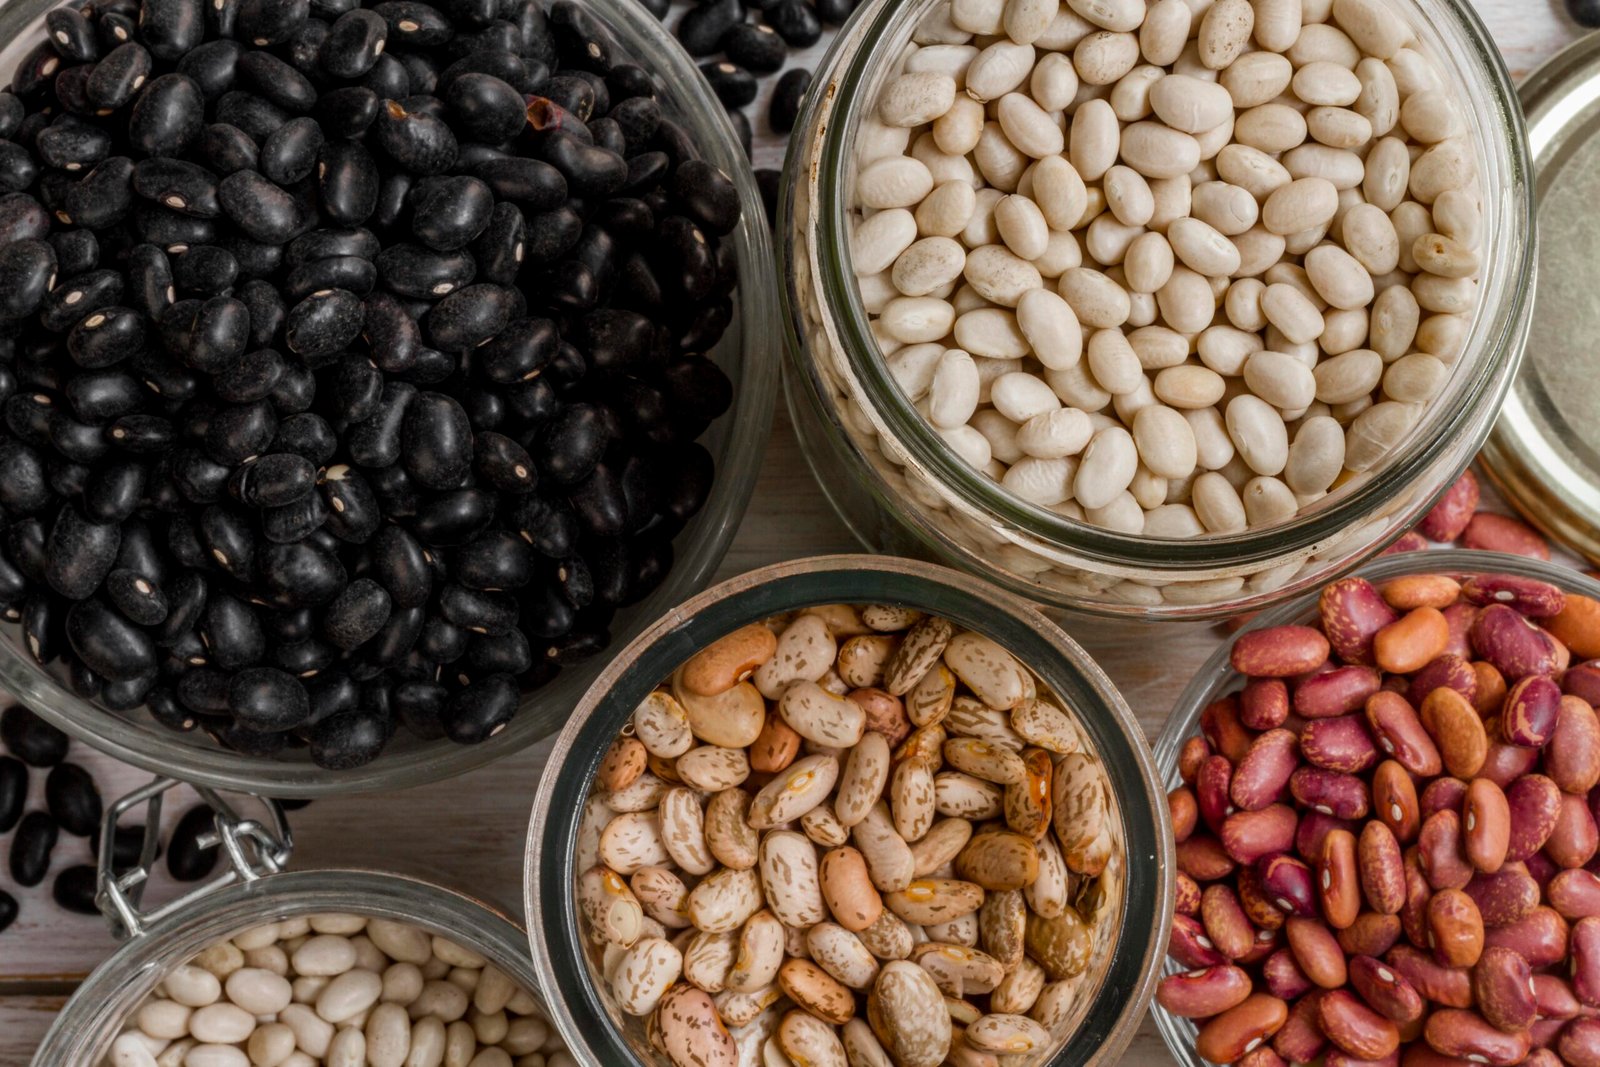
Delicious and Nutritious Vegetarian Meals with Beans
The Financial Case
A one-pound bag of dried beans costs roughly the same as one can of beans, but yields about 6 cups cooked—equivalent to four cans. The math is simple but the savings add up quickly, especially if you incorporate vegetarian meals with beans regularly like I do. Beyond cost savings, beans are nutritional powerhouses providing significant protein, fiber, and essential minerals according to the Harvard School of Public Health.
The Flavor Difference
Home-cooked beans elevate vegetarian meals with beans to an entirely different level compared to canned. They’re creamier, hold their shape better, and absorb the flavors of whatever seasonings you add to the cooking liquid. Once you taste beans cooked in vegetable broth with herbs, going back to the metallic taste of canned beans becomes difficult.
Texture Control
When you cook your own beans, you control the final texture. Want firmer beans for salads? Cook them less. Prefer creamy beans for mashing into dips? Cook them longer. This control is especially important when preparing vegetarian meals with beans for meal prep, where different applications require different textures.
No Added Sodium or Preservatives
Most canned beans contain significant sodium and preservatives. Cooking your own means you control exactly what goes into your body. Using fresh ingredients can elevate your vegetarian meals with beans, making them more enjoyable.
Essential Equipment for Bean Batch Cooking
After years of experimentation, here’s what actually matters:
A heavy-bottomed pot with a lid prevents scorching and ensures even cooking. MyLodge 6 Quart Dutch Ovenhas been my bean-cooking workhorse for three years.

- Quality Enameled Dutch Oven: The Lodge Essential Enamel Cast Iron Dutch Oven gives you all the benefits of cast iron cooking, great heat retention and…
- Simmer in Style: This colorful enamel pot comes in a variety of colors to add a pop of interest to your kitchen or match existing cookware
- Care Instructions: Our non-toxic Dutch oven is dishwasher safe, but hand washing with warm, soapy water and a nylon scrub brush is recommended to keep…
Fine-mesh strainer for rinsing and draining. Thestainless steel strainer setI use handles everything from tiny lentils to large lima beans.

- Stainless Steel
- Imported
- HIGH-QUALITY MESH STRAINERS: The Cuisinart Mesh Strainer with handle set comes in three sizes, including 3⅛″, 5½″, and 7⅞″, for sifting…
Storage containers that seal tightly. I portion cooked beans intofreezer safe storage containersandsilicone freezer bags for different storage needs.

- 100% Leak-proof: Guaranteed no-spill seal and secure latches
- Crystal-clear Tritan Built: Stain-resistant and odor-resistant material for a clear view of contents
- Lightweight & Sturdy: Easy to carry, yet durable for everyday use

- CONTAINS: 4 Stasher Reusable Silicone Bags in the color Clear. Includes 1 Half Gallon (64 Fl Oz), 2 Sandwich (28 Fl Oz), and 1 Snack (12 Fl Oz) Bag.
- BETTER SILICONE BAGS & BOWLS: Made with platinum food-grade silicone and a leak-free Pinch-Loc seal, these reusable food containers are free from…
- REUSABLE, REWASHABLE CONTAINERS: Stasher silicone reusable storage bags make it easy to ditch single-use plastic and meet endless household needs…
The Foolproof Bean Cooking Method
This method works for virtually any bean variety and produces consistently perfect results:
Step 1: Sort and Rinse (5 minutes)
Pour your dried beans onto a large plate or clean kitchen towel. Remove any stones, shriveled beans, or debris—I usually find 2-3 small stones per pound, so this step isn’t optional.
Rinse the sorted beans in a fine-mesh strainer until the water runs clear.
Step 2: The Soaking Decision
Quick soak method (1 hour): Place beans in a pot, cover with 2 inches of water, bring to a boil, then remove from heat and let sit covered for 1 hour. Drain and rinse.
Overnight soak (8+ hours): Cover beans with 2 inches of water and let sit at room temperature overnight. Drain and rinse.
No-soak method: Skip soaking entirely, but add 30-60 minutes to cooking time.
I typically use the overnight soak because it’s the most hands-off approach and I can set it up while cleaning up from dinner.
Step 3: The Cooking Process
Ratio: Use 3 cups liquid to 1 cup dried beans (this gives you room for evaporation).
Liquid choices:
- Water (basic but fine)
- Vegetable broth (my usual choice for extra flavor)
- Water + aromatics (bay leaves, onion quarters, garlic cloves)
Method:
- Combine soaked, drained beans with liquid in your heavy pot
- Bring to a gentle boil, then reduce to a simmer
- Partially cover (to prevent overflow but allow evaporation)
- Cook, stirring occasionally, until beans are tender
DO NOT add salt, acidic ingredients (tomatoes, vinegar, wine), or hard water during cooking—these prevent beans from softening properly. Add these after cooking. The science behind this is well-documented by Serious Eats’ bean cooking research, which explains how salt affects pectin in bean skins.
Step 4: Testing for Doneness
Start testing beans after the minimum cooking time (see chart below). A properly cooked bean should:
- Yield easily when pressed with a fork
- Have a creamy interior with no chalky center
- Hold its shape without being mushy
Taste 3-4 beans from different parts of the pot since they can cook unevenly.

Bean Cooking Times & Tips
| Bean Type | Soaked Cook Time | No-Soak Cook Time | Best Uses |
|---|---|---|---|
| Black beans | 60-90 minutes | 90-120 minutes | Mexican dishes, burgers, soups |
| Chickpeas | 90-120 minutes | 2-3 hours | Hummus, curries, roasting |
| Navy beans | 45-60 minutes | 90-120 minutes | Baked beans, soups, dips |
| Kidney beans | 60-90 minutes | 2-2.5 hours | Chili, salads, stews |
| Pinto beans | 60-90 minutes | 90-120 minutes | Refried beans, Mexican dishes |
| Cannellini | 45-60 minutes | 90-120 minutes | Italian dishes, salads |
| Lentils (red) | No soaking needed | 15-20 minutes | Quick cooking, sauces, dhal |
| Lentils (green/brown) | No soaking needed | 25-35 minutes | Salads, grain bowls |
Pro tip: Different bean varieties can have dramatically different cooking times even within the same type, depending on age and storage conditions. Beans that have been stored for over a year may never fully soften, no matter how long you cook them.
Flavoring Your Beans
Once your beans are tender, you can enhance their flavor:
Basic Seasoning
- 1 teaspoon salt per cup of dried beans
- Fresh cracked black pepper
- A drizzle of good olive oil
Mediterranean Style
- Salt, pepper, olive oil
- Fresh rosemary or thyme
- Lemon zest

Mexican Inspired
- Salt, pepper
- Cumin and smoked paprika
- Fresh cilantro and lime juice
Asian Influence
- A splash of soy sauce
- Sesame oil
- Fresh ginger
Add these flavorings after the beans are cooked and drained, while they’re still warm to absorb maximum flavor.
Once your beans are perfectly seasoned, they become the foundation for countless delicious dishes. Pair them with my 5 essential meal prep sauces to create restaurant-quality vegetarian meals at home without the restaurant prices.
Storage and Meal Prep Applications
Refrigerator Storage
Cooked beans keep in the refrigerator for 4-5 days in airtight containers, following USDA food safety guidelines.
Storage tip: Keep beans in their cooking liquid if you have space—it prevents them from drying out and adds flavor to whatever you’re making.
Freezer Storage
Beans freeze beautifully for up to 6 months. I portion them into:
- 2-cup portions in freezer-safe containers (equivalent to about 1.5 cans)
- 1-cup portions in silicone bags for single-meal additions
Freezing tip: Spread beans on a baking sheet to freeze individually first, then transfer to containers. This prevents them from freezing in one solid block.
Quick-Thaw Methods
- Refrigerator: Move to fridge the night before you need them
- Cold water bath: Submerge sealed container in cold water, changing water every 30 minutes
- Direct from frozen: Add frozen beans directly to soups, stews, or sauces during cooking
Troubleshooting Common Problems
Beans Won’t Soften
Possible causes: Old beans, hard water, acidic ingredients added too early, insufficient cooking time
Solutions: Cook longer, add a pinch of baking soda, ensure water isn’t too acidic
Beans Are Mushy
Cause: Overcooking or beans that were too old when purchased
Prevention: Test frequently once minimum cooking time is reached
Fix: Use mushy beans for hummus, bean dips, or refried beans
Making silky hummus from your batch-cooked chickpeas? A quality food processor makes all the difference. Check out my top-rated food processor recommendations for the best options at every budget.
Beans Split During Cooking
Cause: Usually normal, especially with older beans
Not a problem: Split beans still taste great and work perfectly in most applications
Foam During Cooking
Cause: Natural starches and proteins from beans
Solution: Skim foam with a spoon if desired, but it’s not necessary for food safety
Weekly Bean Prep Strategy
I cook 2-3 different bean varieties in large batches to power my vegetarian meals with beans throughout the week:
Every Other Sunday
I cook 2-3 different bean varieties in large batches:
- 2 cups black beans
- 2 cups chickpeas
- 1 cup red lentils (these cook so quickly I often make them mid-week)
This gives me protein options for 2+ weeks with just one afternoon of cooking. This batch cooking approach is central to my weekly meal prep routine, where I prepare multiple components every Sunday for efficient weeknight cooking.
Storage Organization
Proper labeling is crucial when meal prepping vegetarian meals with beans for the week.
I use masking tape labels with:
- Bean type
- Date cooked
- Whether they’re seasoned or plain
Plain beans offer more flexibility for creating diverse vegetarian meals with beans with different flavor profiles throughout the week.
Recipe Ideas Using Batch Method For Your Vegetarian Meals With Beans

Here are quick meal ideas using your batch-cooked beans. For more seasonal inspiration, explore my seasonal vegetarian meal prep guide with dishes perfect for every season.
Monday: Mediterranean Chickpea Salad
Chickpeas + cucumber + tomatoes + feta + lemon-herb dressing
Tuesday: Black Bean and Sweet Potato Tacos
Seasoned black beans + roasted sweet potatoes + avocado + my homemade taco sauce
Wednesday: White Bean and Kale Soup
Cannellini beans + vegetable broth + massaged kale
Thursday: Red Lentil Curry
Red lentils + coconut milk + curry spices + vegetables
Friday: Three-Bean Chili
Mixed beans + tomatoes + spices (perfect for using up odds and ends)
Cost Breakdown: Homemade vs. Store-Bought
Based on my local grocery store prices:
Dried black beans:
- 1 lb bag: $1.99
- Yields: ~6 cups cooked
- Cost per cup: $0.33
Canned black beans:
- 15 oz can: $1.29
- Yields: ~1.5 cups
- Cost per cup: $0.86
Annual savings cooking 2 cups beans weekly: $55
Time investment: About 2 hours every other week for multiple bean varieties. This small time investment unlocks endless possibilities for budget-friendly vegetarian meals with beans.
For me, the combination of cost savings, better flavor, and ingredient control makes this time investment completely worthwhile, making vegetarian meals with beans a breeze!
Making Vegetarian Meals With Beans Part of Your Routine
The key to successful bean batch cooking for vegetarian meals with beans is making it automatic:
Sunday Routine
- Start bean soaking Saturday night while cleaning up dinner
- Begin cooking Sunday morning during coffee/breakfast
- Beans simmer while I prep other meal components
- Cool and portion while cleaning up from prep session
Mid-Week Assessment
Every Wednesday, I check my bean supply and plan whether I need to cook more for the following week.
Menu Planning Integration
When I plan weekly meals, I always include 2-3 vegetarian meals with beans options since they’re economical, filling, and nutritious.
Final Tips for Bean Success
- Buy from stores with high turnover to ensure fresher beans
- Store dried beans in airtight containers to maintain freshness
- Don’t salt until after cooking to prevent tough skins
- Cook extra since they freeze beautifully
- Save cooking liquid for soup bases or bread making
- Experiment with varieties to prevent flavor fatigue. Each variety brings unique texture and flavor to your vegetarian meals with beans repertoire
Remember, mastering vegetarian meals with beans is a skill that develops with practice. Don’t be discouraged if your first batch isn’t exactly what you envisioned. Even imperfectly cooked beans are more economical and flavorful than most canned alternatives.
The satisfaction of opening your freezer to find containers of perfectly cooked beans, knowing you spent $2 on ingredients that would have cost $8 canned, never gets old. Plus, the aroma of beans simmering with herbs transforms your kitchen into the most welcoming space in your home.
Frequently Asked Questions About Cooking Vegetarian Meals With Beans
How long do dried beans last in storage?
Dried beans can last 2-3 years in airtight containers stored in a cool, dry place. However, beans older than one year may take significantly longer to cook and might never fully soften, regardless of cooking time. For best results, buy from stores with high turnover and use beans within 12 months.
Do I really need to soak beans before cooking?
Soaking isn’t always required but highly recommended. Soaking reduces cooking time by 30-60 minutes, helps beans cook more evenly, and can reduce digestive discomfort. You have three options: overnight soak (8+ hours), quick soak (1 hour), or skip soaking entirely and add extra cooking time.
Why won’t my beans soften no matter how long I cook them?
The most common causes are old beans (over 1-2 years), hard water, or adding acidic ingredients (tomatoes, vinegar, wine) or salt too early. Try adding a pinch of baking soda to the cooking water, ensure you’re not adding salt until after cooking, and consider that very old beans may never fully soften.
Can I cook different types of beans together?
While possible, it’s not recommended since different bean varieties have vastly different cooking times. Black beans might be done in 60 minutes while chickpeas need 2 hours. Cooking them together results in some beans being mushy while others remain undercooked.
How can I reduce gas and bloating from beans?
Soak beans and discard the soaking water before cooking, as this removes some of the complex sugars that cause gas. Cook beans thoroughly until completely tender, add kombu seaweed to the cooking water, and introduce beans gradually into your diet to allow your digestive system to adapt.
Are canned beans as nutritious as home-cooked beans?
Yes, canned and home-cooked beans have similar nutritional profiles. The main differences are that home-cooked beans contain significantly less sodium (unless you add it), no preservatives, better texture control, and cost about 60-70% less than canned options.
How do I know when beans are fully cooked?
Properly cooked beans should yield easily when pressed with a fork, have a creamy interior with no chalky or grainy center, and hold their shape without being mushy. Always taste 3-4 beans from different parts of the pot since they can cook unevenly.
Want more money-saving meal prep strategies? Join my email list for weekly tips on eating well for less while maintaining a healthy vegetarian lifestyle.
Questions about bean cooking? Drop them in the comments below—I love helping fellow meal preppers troubleshoot their kitchen challenges!